Creating and Authenticating a Microsoft Dynamic 365 CE Connector
For Microsoft Dynamics 365 CE, a service account is necessary when configuring the connector. Client ID and secret are not supported. Smart Flows uses user delegation. This allows Smart Flows to access data from Microsoft Dynamics 365 CE on behalf of the end user.
Required Permissions
| 1. | Read permissions for every entity that you want to use in your flows and templates. |
| 2. | Permission to create a letter, e-mail activity, task, and note regarding any of those entities. |
| 3. | Full control for the Smart Flows Configuration entity created by our managed solution (another way of doing this is by giving the Smart Flows Admin role to the service account). |
| 4. | If you want to use the e-mail for Microsoft Dynamics 365 CE flow block to send e-mail on another user's behalf see - Power Platform | Microsoft Learn to send e-mails in the name of those users. |
| 5. | The delegate role to allow the service account to act on behalf of the user. |
| 1. | In the Project Console's Control panel, select the Connectors button. |
The Connectors List view displays.
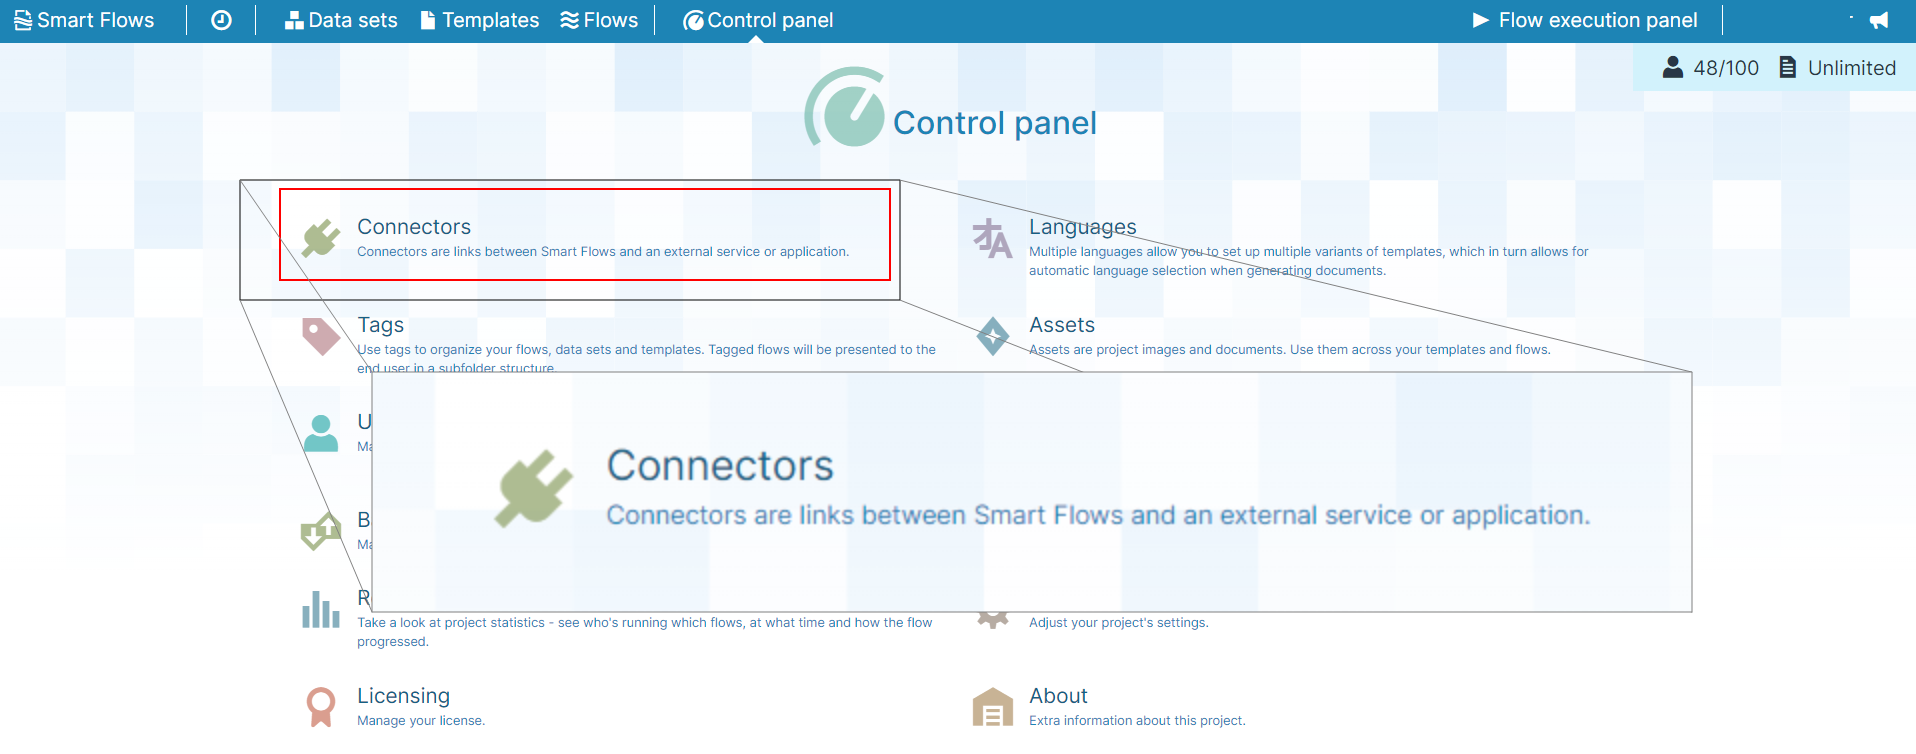
| 2. | Select the +Create button. |
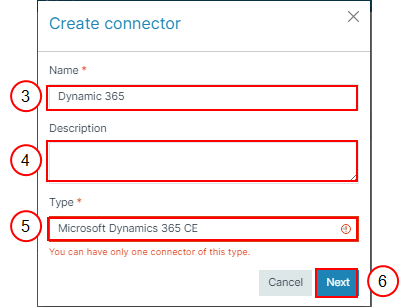
The Create connector wizard displays.

| 3. | In the Name field, input the name of your connector. |
| 4. | (Optional) In the Description field, input a description for your connector. |
| 5. | In the Type dropdown menu, select Microsoft Dynamics 365 CE. |
| 6. | Select the Next button. |
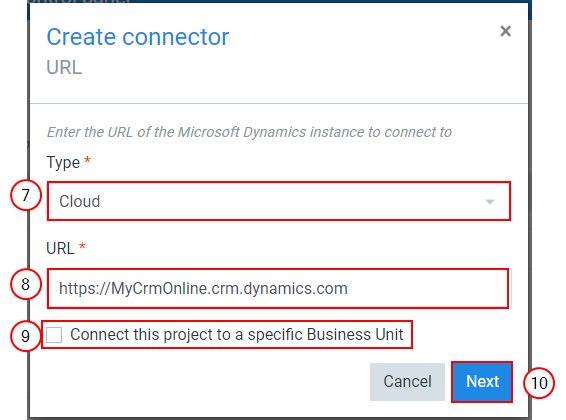
The Create Connector URL window displays.
There are two types of instances. You can select the one based on your preference.
On-premise: The customer has a Microsoft Dynamics 365 CE running on a server they can manage themselves.
Cloud: The hosting is done by a cloud provider. Example: Microsoft allows you to start a Microsoft Dynamics 365 CE they host for you.
| 7. | In the Type dropdown menu, select the instance. |
| 8. | In the URL field, input the URL of your Microsoft Dynamics 365 CE instance. |
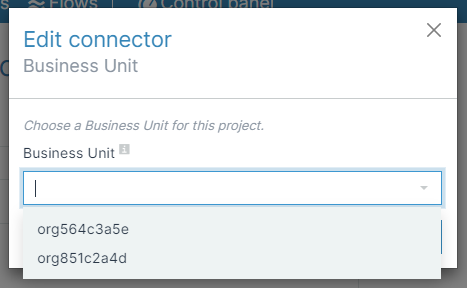
| 9. | (Optional) Select the checkbox to connect your project to a specific Business Unit |
You can choose which Business Unit you want to connect. This option is adjustable throughout the project. Suppose you reconfigure the Business Unit and change it in Smart Flows. In this case, you must manually adjust the Business Unit in the Microsoft Dynamics 365 CE configuration record for Smart Flows and save your changes. You should update the changes in both Smart Flows and Microsoft Dynamics 365 CE records.
Selecting the correct Business Unit ensures you only see information acessible to your department. If you don't select the specific business unit, you could get errors through Smart Flows indicating that Smart Flows can't access the Dynamics instance.
The Edit Connector Business Unit window displays.
| 10. | Select the Next button. |
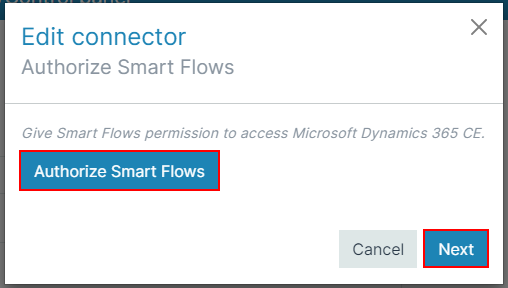
The Create connector Authorize Smart Flows window displays.
| 11. | Select the Authorize Smart Flows button. |
The system opens the Microsoft Dynamics 365 CE website.
| 12. | Confirm your credentials for Microsoft Dynamics 365 CE. |
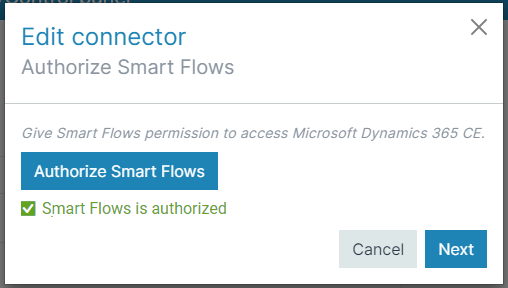
The system redirects you to the Smart Flows.
Smart Flows is authorized and displays under the Authorize Smart Flows button.
| 13. | Select the blue Next button. |
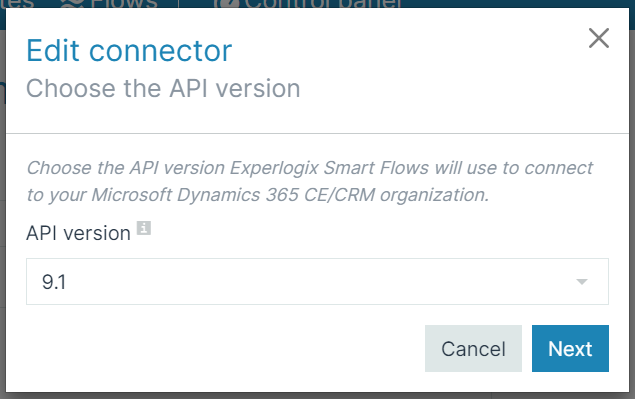
The Edit connector Choose the API version window displays.
| 14. | In the API version dropdown menu, select the latest API version. |
Import Smart Flows Solution window displays.
Decision Point
Determine how you import data into Smart Flows(Import the Smart Flows solution for Dynamics 365).
Import Automatically: requires a System Administrator role for creating a connector. The easiest way would be to install the solution automatically.
Import manually: requires Service Writer and UIIAdministrator role for creating a connector.
Skip import: skips the import process altogether.
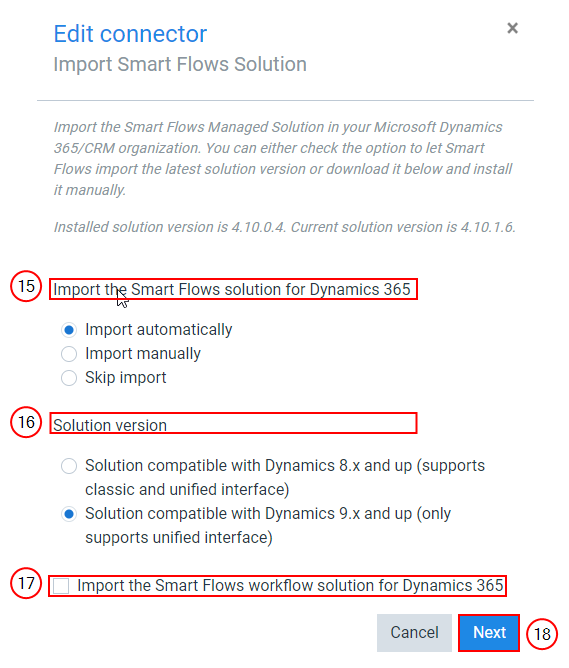
| 15. | Under Import the Smart Flows solution for Dynamics 365, select your desired import method. |
| 16. | Under the Solution version, select the solution compatibility for your Dynamics versioning to import the Smart Flows solution for Microsoft Dynamics 365 CE. |
| 17. | Select Import the Smart Flows workflow solution for Microsoft Dynamics 365 CE checkbox to trigger Microsoft Dynamics 365 CE workflow. |
| 18. | Select the blue Next button. |
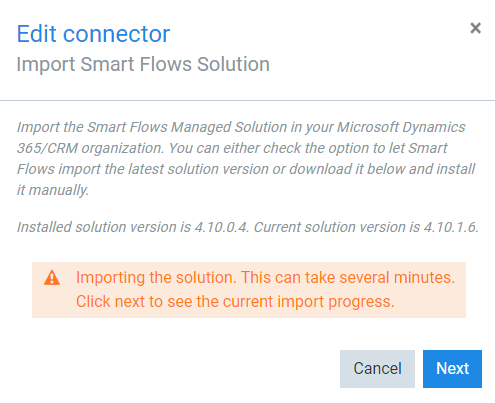
The Import is in progress notification displays.
| 19. | Select the blue Next button. |
Add Smart Flows Configuration window displays.
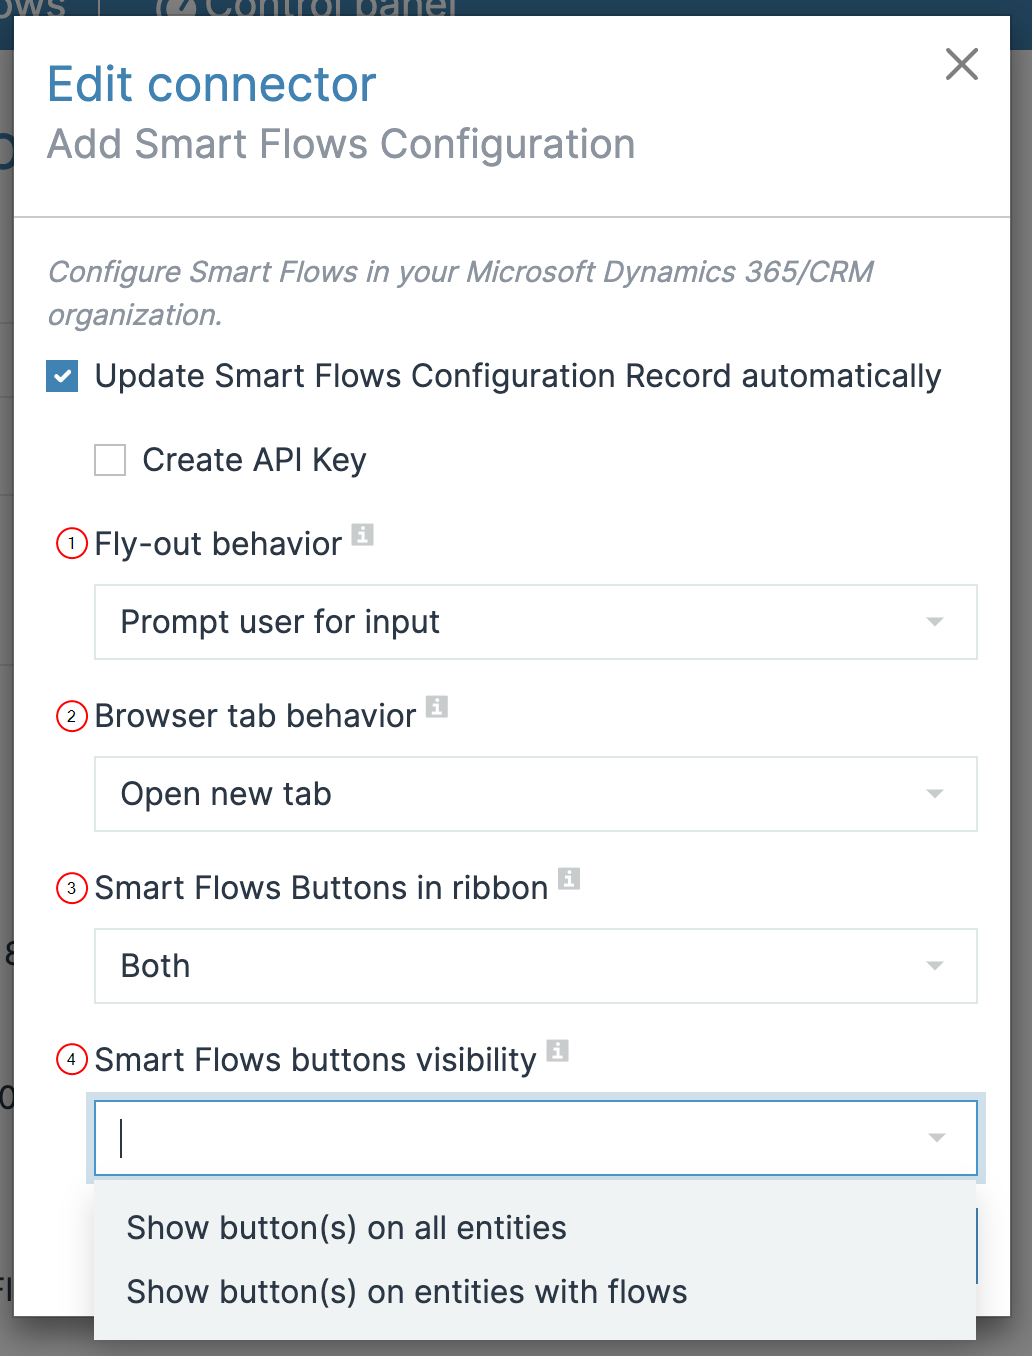
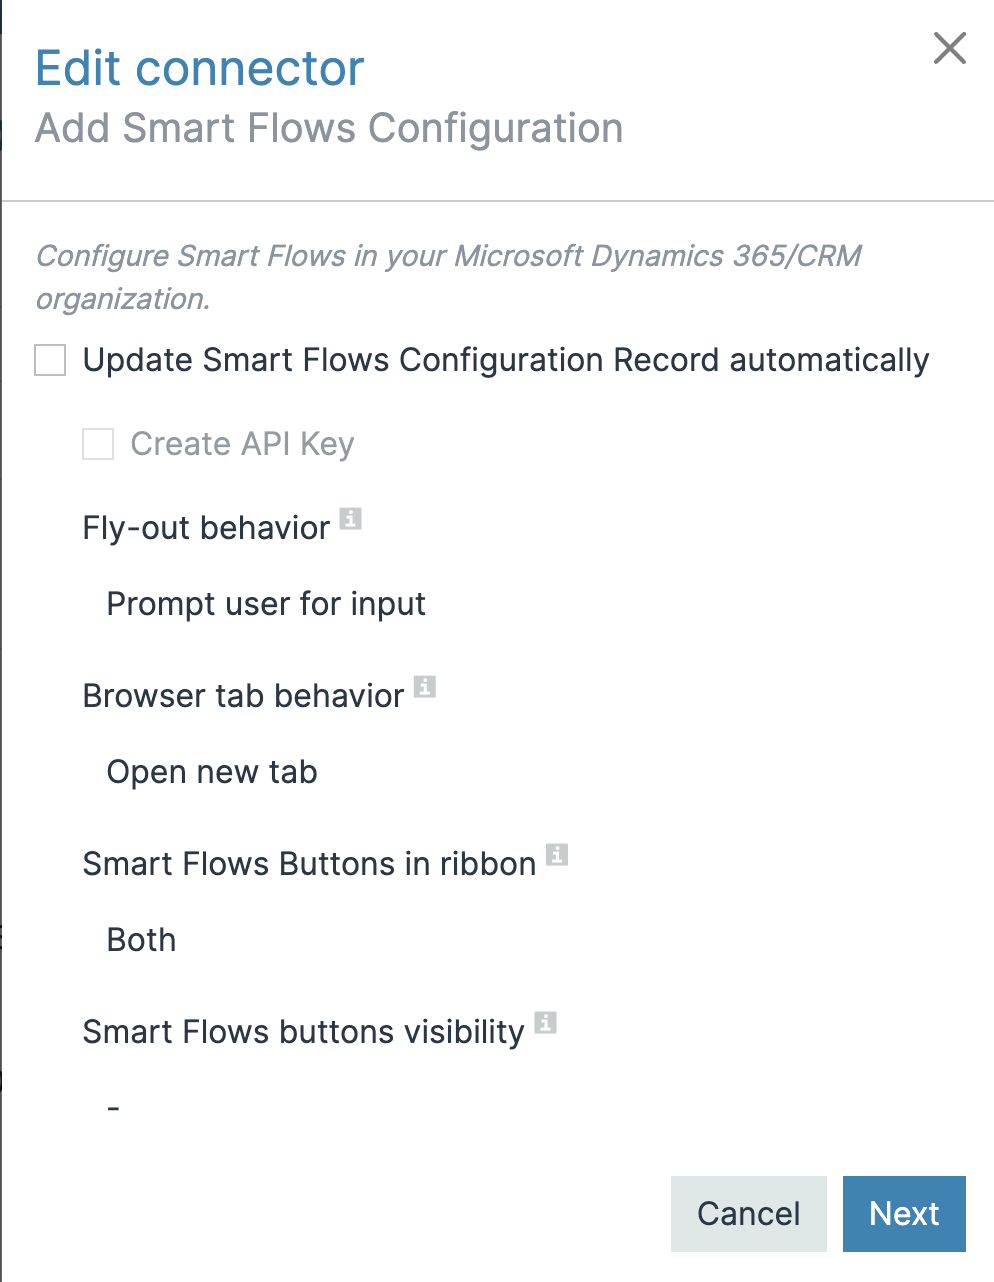
| 20. | (Optional) Select checkbox Update Smart Flows Configuration Record automatically to edit the configuration. |
In Smart Flows you have the option to update the records in Project Console. All settings are present, including a new setting (Smart Flows buttons visibility) which allows the user to configure the visibility of the Smart Flows buttons in Microsoft Dynamics 365 CE and manage the button behavior from Project Console when configuring connector.
|
Index No. |
Field | Description | ||||||||
|---|---|---|---|---|---|---|---|---|---|---|
|
1 |
Configure Fly-out behavior |
|
||||||||
|
2 |
Configure Browser tab behavior |
|
||||||||
|
3 |
Smart Flows Buttons in ribbon |
|
||||||||
|
4 |
Smart Flows buttons visibility |
|
| 21. | (Optional) Select checkbox Create API Key. |
| 22. | Select the blue Next button. |
Smart Flows displays a summary of the configuration.
| 23. | Select the Finish button to conclude the creation of your Microsoft Dynamics 365 CE connector. |
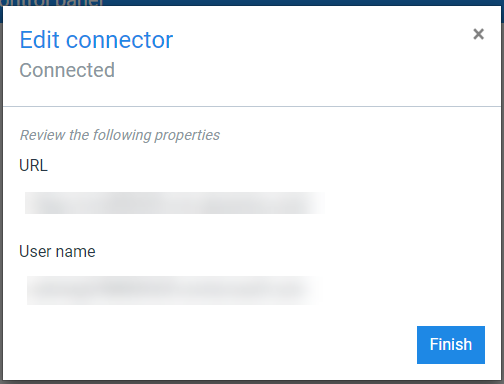
The configuration summary of Microsoft Dynamics 365 CE connector displays.
Authenticating a Microsoft Dynamics 365 CE Connector
Smart Flows allows two authentication mechanisms for creating a Microsoft Dynamics 365 CE connector.
-
Connector authentication: Smart Flows backend uses these credentials to connect to Microsoft Dynamics 365 CE on demand. Smart Flows needs a persistent way to do this: either using a long-lasting OAuth2 refresh token (currently only available in ADFS 4.0/5.0) or a Username / Password. If you have Active Directory Federation Services (ADFS
 Active Directory Federation Services enables Federated Identity and Access Management by securely sharing digital identity and entitlements rights across security and enterprise boundaries.), Smart Flows use OAuth2 to authenticate users.
 -
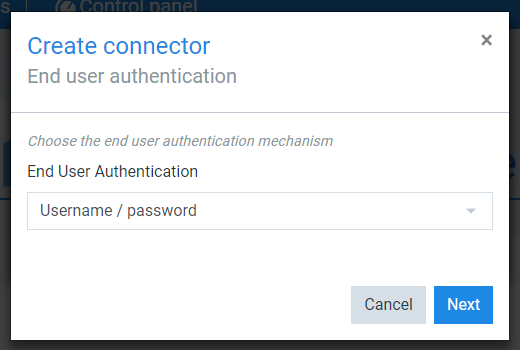
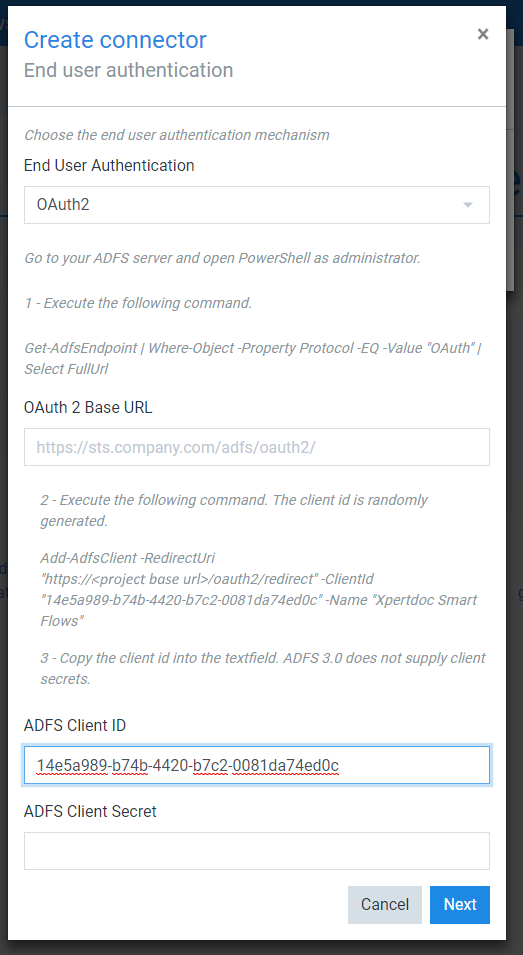
End user authentication:Users can access Smart Flows using their credentials they use to log in to Microsoft Dynamics 365 CE. Smart Flows never stores these credentials. If you have Active Directory
Active Directory contains all of the user information., users can enter their AD credentials in Smart Flows using Username / Password, which will be only in memory for a short time to validate them and retrieve the CRM user id.
|
Authentication mechanism |
Connector authentication |
End user authentication |
|---|---|---|
|
AD FS 2016/2019 (4.0/5.0) |
OAuth2 |
(OAuth2) |
|
AD FS 2012 R2 (3.0) |
Username / Password |
OAuth2 |
|
Active Directory |
Username / password |
Username / password |
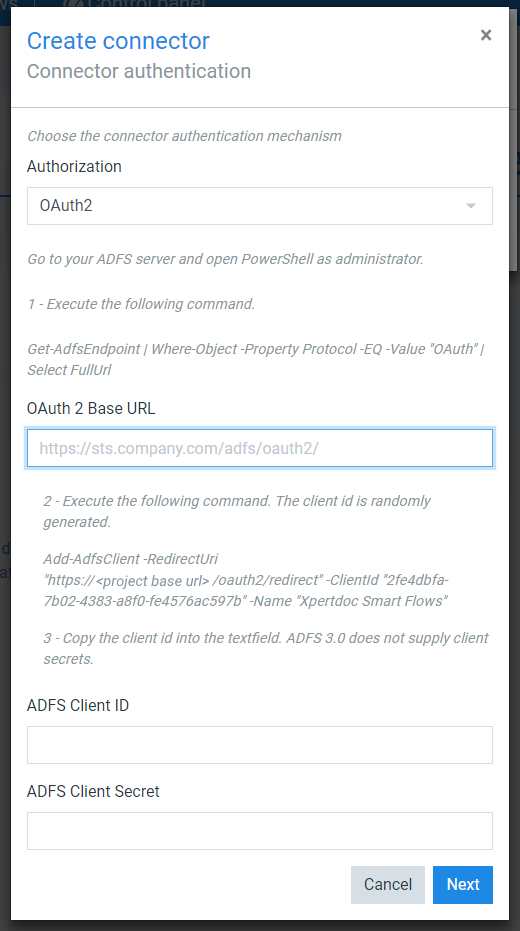
Suppose you select OAuth2 as the connector authentication mechanism. Use the Get-AdfsEndpoint to get the authorization endpoint and the Add-AdfsServerApplication cmdlet to generate a Client Id and Client Secret.
To authenticate using AD FS 2012 R2, we need either of the following:
-
An internal binding: If you have an internal binding where legacy users connect via Windows authentication, the endpoint can use Windows credentials.
-
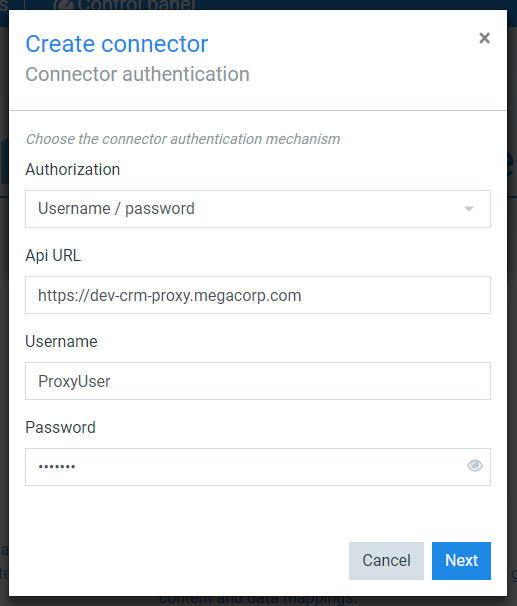
Proxy: If you do not have an internal binding, you can set up the proxy which will use OAuth2 to periodically request access tokens using a configured username and password. It is secured using basic authentication using username and password.
|
Setup |
API URL |
Username |
|---|---|---|
|
Internal binding |
The internal binding URL |
The Windows credentials for the connector user. |
|
Proxy |
The proxy URL |
The Proxy credentials are specified in the proxy configuration. The connector user is configured on the proxy. |
Follow the instructions on AdfsEndpoint to get the URL and client id. Copy the auto generated ID from the Add-AdfsClient into the ADFS Client ID field. AD FS 2012 R2 does not provide a client secret; this can be left blank.
Active Directory uses Username / password as the authentication mechanism. In this case, leave the API URL field empty and enter the Windows credentials for the connector user in the Username and Password fields.
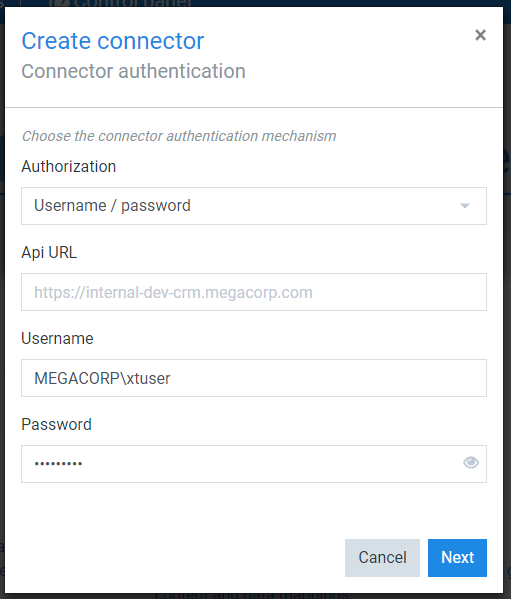
In the End User Authentication dropdown menu, select Username / password.